2d GI Series #1 - Unity custom pipeline setup
•Table of Contents
- Our goals for the first part
- The render pipeline script and asset
- Basic Render method setup
- Base Pass
- Blit to screen Pass
- Final thoughts
Our goals for the first part
In this first blog post we will create a minimal 2d rendering pipeline, by utilizing the unity render graph system. Our render pipeline will have a native size render target, on which we will render our sprites. That render target will then be drawn to screen. This will allow us to separate the render resolution from the final presentation resolution.
This first part will not be a very in-depth look since most of the initial steps can be easily understood by looking at the code and comments. Expect though a lot of code blocks as we lay down the basics of our render pipeline!
The render pipeline script and asset
Let’s start! First step is to create a new unity project (3d core template - built in pipeline) and install the Core RP Library package from the package manager. In this series we will be using Unity 2023.2.x and Core RP Library 16.x versions. 
We will also need to create two scripts, one for our render pipeline logic and one for our render pipeline asset.
public partial class MyRenderPipeline : RenderPipeline
{
    public static readonly Vector2Int NativeResolution = new(320, 180);
    private RenderGraph _renderGraph;

    // Most of our shaders will need to know these
    // so let's assign them as "global" shader values
    // instead of passing them to each shader
    private static readonly int NativeResolutionID = Shader.PropertyToI("_NativeResolution");
    private static readonly int NativeTexelSizeID = Shader.PropertyToI("_NativeTexelSize");
    private static readonly int NativeSquareResolutionID = ShaderPropertyToID("_NativeSquareResolution");
    private static readonly int NativeSquareTexelSizeID = Shader.PropertyToID("_NativeSquareTexelSize");

    public MyRenderPipeline()
    {
         _renderGraph = new RenderGraph("MyRenderGraph");

        // Initialize those global shader values
        Shader.SetGlobalVector(NativeResolutionID, (Vector2)NativeResolution);
        Shader.SetGlobalVector(NativeTexelSizeID, Vector2.one/NativeResolution);
        var squareRes = new Vector2Int(Mathf.Max(NativeResolution.x, NativeResolution.y), Mathf.Max(NativeResolution.x, NativeResolution.y));
        Shader.SetGlobalVector(NativeSquareResolutionID, (Vector2)squareRes);
        Shader.SetGlobalVector(NativeSquareTexelSizeID, Vector2.one/squareRes);
    }

    protected override void Render(ScriptableRenderContext context, Camera[] cameras)
    {

    }

    protected override void Dispose(bool disposing)
    {
        _renderGraph.Cleanup();
        _renderGraph = null;
        base.Dispose(disposing);
    }
}
[ExecuteInEditMode]
public class MyRenderPipelineAsset : RenderPipelineAsset<MyRenderPipeline>
{
#if UNITY_EDITOR
    [UnityEditor.MenuItem("Assets/Create/Render Pipeline/MyRenderPipeline", priority = 1)]
    static void CreateRenderPipeline()
    {
        var instance = CreateInstance<MyRenderPipelineAsset>();
        UnityEditor.ProjectWindowUtil.CreateAsset(instance, "MyRenderPipeline.asset");
    }
#endif

    protected override RenderPipeline CreatePipeline()
    {
        return new MyRenderPipeline();
    }
}
Now create a new MyRenderPipeline.asset through the right click menu and assign it on Edit/ProjectSettings/Graphics/DefaultRenderPipeline field. If you’ve done those steps correctly you will be greeted with a marvelous black screen on the game view. Congrats 🎉
When researching writing custom SRP pipelines i stumbled upon cinight’s github repo who uses partial classes to setup his different render passes, thus making the code easier to read and work on 👌 His repo is also an amazing resource that i use regularly, go give him a 🌟 From Render Graph system documentation: The render graph system sits on top of Unity’s Scriptable Render Pipeline (SRP). It allows you to author a custom SRP in a maintainable and modular way. Unity’s High Definition Render Pipeline (HDRP) uses the render graph system. You use the RenderGraph API to create a render graph. A render graph is a high-level representation of the custom SRP’s render passes, which explicitly states how the render passes use resources. Describing render passes in this way has two benefits: it simplifies render pipeline configuration, and it allows the render graph system to efficiently manage parts of the render pipeline, which can result in improved runtime performance. For more information on the benefits of the render graph system, see benefits of the render graph system.
Why is MyRenderPipeline a partial class?
Why Render Graph API?
Basic Render method setup
The Render method on MyRenderPipeline.cs is the one that will be called every frame and will be in charge of running all our rendering logic. So let’s revisit it a bit to add some boiler plate code.
protected override void Render(ScriptableRenderContext context, Camera[] cameras)
{
    BeginFrameRendering(context, cameras);

    foreach (var camera in cameras)
    {
        BeginCameraRendering(context, camera);

        //Culling
        if (!camera.TryGetCullingParameters(out var cullingParams)) continue;
        var cullResults = context.Cull(ref cullingParams);

        //Camera setup
        context.SetupCameraProperties(camera);

        //Execute graph
        var cmdBuffer = CommandBufferPool.Get("ExecuteRenderGraph");
        var renderGraphParams = new RenderGraphParameters()
        {
            executionName = "RenderGraphExecute",
            commandBuffer = cmdBuffer,
            scriptableRenderContext = context,
            currentFrameIndex = Time.frameCount
        };

        using (_renderGraph.RecordAndExecute(renderGraphParams))
        {
            // Base Pass

            // Blit to screen Pass
        }

        context.ExecuteCommandBuffer(cmdBuffer);
        CommandBufferPool.Release(cmdBuffer);
        context.Submit();
        EndCameraRendering(context, camera);
    }

    _renderGraph.EndFrame();
    EndFrameRendering(context, cameras);
}
The code is pretty much self explanatory. Every frame for each camera in our scene we perform culling first. If culling fails, it means that our camera is not valid for rendering so we continue to our next one. If the camera is valid we continue setting up our camera and a command buffer for our render graph. In the RecordAndExecute section we will be defining our render passes. After executing , submitting and releasing the command buffer resources we are ready to move on to our next camera. After all cameras are finished our job is done.
For this series we only care about one camera, but we might visit multi camera rendering at some point.
Base Pass
Since our goal is a 2d renderer, our base pass will need to be able to sort and render unity sprites. Since sprites usually have transparency we will use the CommonTransparent sorting criteria, and pick objects that belong to the transparent render queue. For now the base pass will write to a texture that we call Albedo that is cleared with the camera background color. In later chapters our base pass will use multiple render targets as we will need more data for our global illumination calculations.
public partial class MyRenderPipeline
{
    private readonly ShaderTagId _basePassID = new("BasePass");

    public class BasePassData
    {
        public RendererListHandle RendererListTransparent;
        public TextureHandle Albedo;
    }

    public BasePassData RenderBasePass(Camera camera, RenderGraph renderGraph, CullingResults cullingResults)
    {
        using var builder = renderGraph.AddRenderPass<BasePassData>("Base Pass", out var basePassData);
        // Setup Textures
        var albedo = CreateColorTexture(renderGraph, "Albedo", camera.backgroundColor);
        basePassData.Albedo = builder.UseColorBuffer(albedo, 0);

        // Create RendererList of objects that have the "BasePass" ID and are in the transparent queue sorted back to front
        RendererListDesc rendererListTransparent = new(_basePassID, cullingResults, camera)
        {
            sortingCriteria = SortingCriteria.CommonTransparent,
            renderQueueRange = RenderQueueRange.transparent
        };

        var rendererListTransparentHandle = renderGraph.CreateRendererList(rendererListTransparent);
        basePassData.RendererListTransparent = builder.UseRendererList(rendererListTransparentHandle);

        // Builder
        builder.SetRenderFunc((BasePassData data, RenderGraphContext context) =>
        {
            CoreUtils.DrawRendererList(context.renderContext, context.cmd, data.RendererListTransparent);
        });

        return basePassData;
    }
}
For more details on how we create resources and define render passes with the render graph api feel free to check the official documentation!
In general each pass will contain a data class that in the RenderXPass method we will need to fill with the appropriate data. Here we will need a texture that the pass will write to, and a renderer list that contains the list of objects that we will render.
After creating and initializing our data class, we have to define the render method which takes as input our data class. This happens with the builder.SetRenderFunc(). In this example we just need to call DrawRendererList() to render the list we created earlier.
Finally since we will need the Albedo texture handle in the next pass the RenderBasePass method also returns the basePassData.
private TextureHandle CreateColorTexture(RenderGraph renderGraph, string name, Color clearColor, FilterMode filterMode = FilterMode.Point)
{
    var colorSRGB = QualitySettings.activeColorSpace == ColorSpace.Linear;

    TextureDesc colorRTDesc = new(NativeResolution.x, NativeResolution.y)
    {
        name = name,
        colorFormat = GraphicsFormatUtility.GetGraphicsFormat(RenderTextureFormat.Default, colorSRGB),
        depthBufferBits = 0,
        msaaSamples = MSAASamples.None,
        enableRandomWrite = false,
        clearBuffer = true,
        clearColor = clearColor,
        discardBuffer = false,
        wrapMode = TextureWrapMode.Clamp,
        filterMode = FilterMode.Point
    };

    return renderGraph.CreateTexture(colorRTDesc);
}
Sprite shader
Here is a very simple sprite shader that we should assign on our sprite materials so that they can be rendered by our pipeline. Notice the Tags { “Queue”=“Transparent” } and Tags { “LightMode” = “BasePass” } which are important so that our sprites get picked up when creating the renderer list on our base pass. Also our fragment shader returns an RTstruct instead of just a float4 so that we will be ready to add multiple render target methodality on the next part.
Shader "MyPipeline/Sprite"
{
    Properties
    {
        [PerRendererData] _MainTex ("MainTex (RGBA)", 2D) = "white" {}
        _Color("Main Color", Color) = (1,1,1,1)
    }
    SubShader
    {
        Tags { "Queue"="Transparent" }
        Pass
        {
        	Tags { "LightMode" = "BasePass" }
        	Blend SrcAlpha OneMinusSrcAlpha

        	HLSLPROGRAM

        	#pragma vertex vert
        	#pragma fragment frag
        	#include "Transformations.hlsl"

        	struct appdata
        	{
        	    float4 vertex : POSITION;
        	    float2 uv : TEXCOORD0;
        	};

        	struct v2f
        	{
        	    float2 uv : TEXCOORD0;
        	    float4 vertex : SV_POSITION;
        	};

        	struct RTstruct
        	{
        	    float4 Albedo : SV_Target0;
        	};

        	CBUFFER_START(UnityPerMaterial)
        	sampler2D _MainTex;
        	float4 _MainTex_ST;
        	float4 _Color;
        	CBUFFER_END

        	v2f vert (appdata v)
        	{
        	    v2f o;
        	    o.vertex = TransformObjectToHClip(v.vertex.xyz);
        	    o.uv = TRANSFORM_TEX(v.uv, _MainTex);
        	    return o;
        	}

        	RTstruct frag (v2f i) : SV_Target
        	{
        	    RTstruct o;

        	    float4 color = tex2D(_MainTex, i.uv);
        	    o.Albedo = color * _Color;

        	    return o;
        	}

        	ENDHLSL
        }
    }
}
Finally lets add the base pass on our pipeline Render method!
protected override void Render(ScriptableRenderContext context, Camera[] cameras)
{
    ...
        using (_renderGraph.RecordAndExecute(renderGraphParams))
        {
            // Base pass
            var basePassData = RenderBasePass(camera, _renderGraph, cullResults);

            // Blit base pass to screen
        }
    ...
}
Blit to screen Pass
Up to this point even if you add some sprites on the scene and assign a material with our sprite shader, the screen will still just show black. Also if you check the frame debugger you will see that it is completely empty. Not even our base pass is there. That happens because the render graph is quite smart. It understands that since nothing from the base pass is used when finally drawing to screen, it gets completely culled. We will “fix” that by adding our blit to screen pass.
public partial class MyRenderPipeline
{
    private static Material _blitToScreenMaterial;

    class BlitToScreenPassData
    {
        public TextureHandle Albedo;
        public TextureHandle CameraTarget;
    }

    public void RenderBlitToScreenPass(RenderGraph renderGraph, TextureHandle albedo)
    {
        if (_blitToScreenMaterial == null) _blitToScreenMaterial = CoreUtils.CreateEngineMaterial(Shader.Find("Hidden/MyPipeline/BlitToScreen"));

        using (var builder = renderGraph.AddRenderPass<BlitToScreenPassData>("BlitToScreenPass", out var passData, new ProfilingSampler("Blit to Screen profiler")))
        {
            passData.Albedo = builder.ReadTexture(albedo);
            passData.CameraTarget = renderGraph.ImportBackbuffer(BuiltinRenderTextureType.CameraTarget);

            builder.SetRenderFunc((BlitToScreenPassData data, RenderGraphContext context) =>
            {
                _blitToScreenMaterial.SetTexture("_Albedo", data.Albedo);
                context.cmd.Blit(null, data.CameraTarget, _blitToScreenMaterial);
            });
        }
    }
}
As you can see here we pass the albedo texture handle from our base pass, and use the camera backbuffer as the blit target. The blit command takes a material parameter, which we initialize with the following shader if it is null.
Blit shader
Shader "Hidden/MyPipeline/BlitToScreen"
{
    Properties
    {
    }

    SubShader
    {
        Pass
        {
            Name "BlitToScreenPass"
            // No culling or depth
            Cull Off ZWrite Off ZTest Always

            HLSLPROGRAM

            #pragma vertex vert
            #pragma fragment frag
            #include "Transformations.hlsl"

            struct appdata
            {
                float4 vertex : POSITION;
                float2 uv : TEXCOORD;
            };

            struct v2f
            {
                float4 vertex : SV_POSITION;
                float2 uv : TEXCOORD;
            };

            v2f vert (appdata v)
            {
                v2f o;
                o.vertex = TransformObjectToHClip(v.vertex.xyz);
                o.uv = v.uv;
                return o;
            }

            sampler2D _Albedo;

            float4 frag (v2f i) : SV_Target
            {
                float3 albedo = tex2D(_Albedo, i.uv).rgb;
                return float4(albedo, 1.0);
            }

            ENDHLSL
        }
    }
}
Finally go on ahead and add the call to RenderBlitToScreenPass on our base pipeline Render method.
protected override void Render(ScriptableRenderContext context, Camera[] cameras)
{
    ...
        using (_renderGraph.RecordAndExecute(renderGraphParams))
        {
            // Base pass
            var basePassData = RenderBasePass(camera, _renderGraph, cullResults);

            // Blit base pass albedo to screen
            RenderBlitToScreenPass(_renderGraph, basePassData.Albedo);
        }
    ...
}
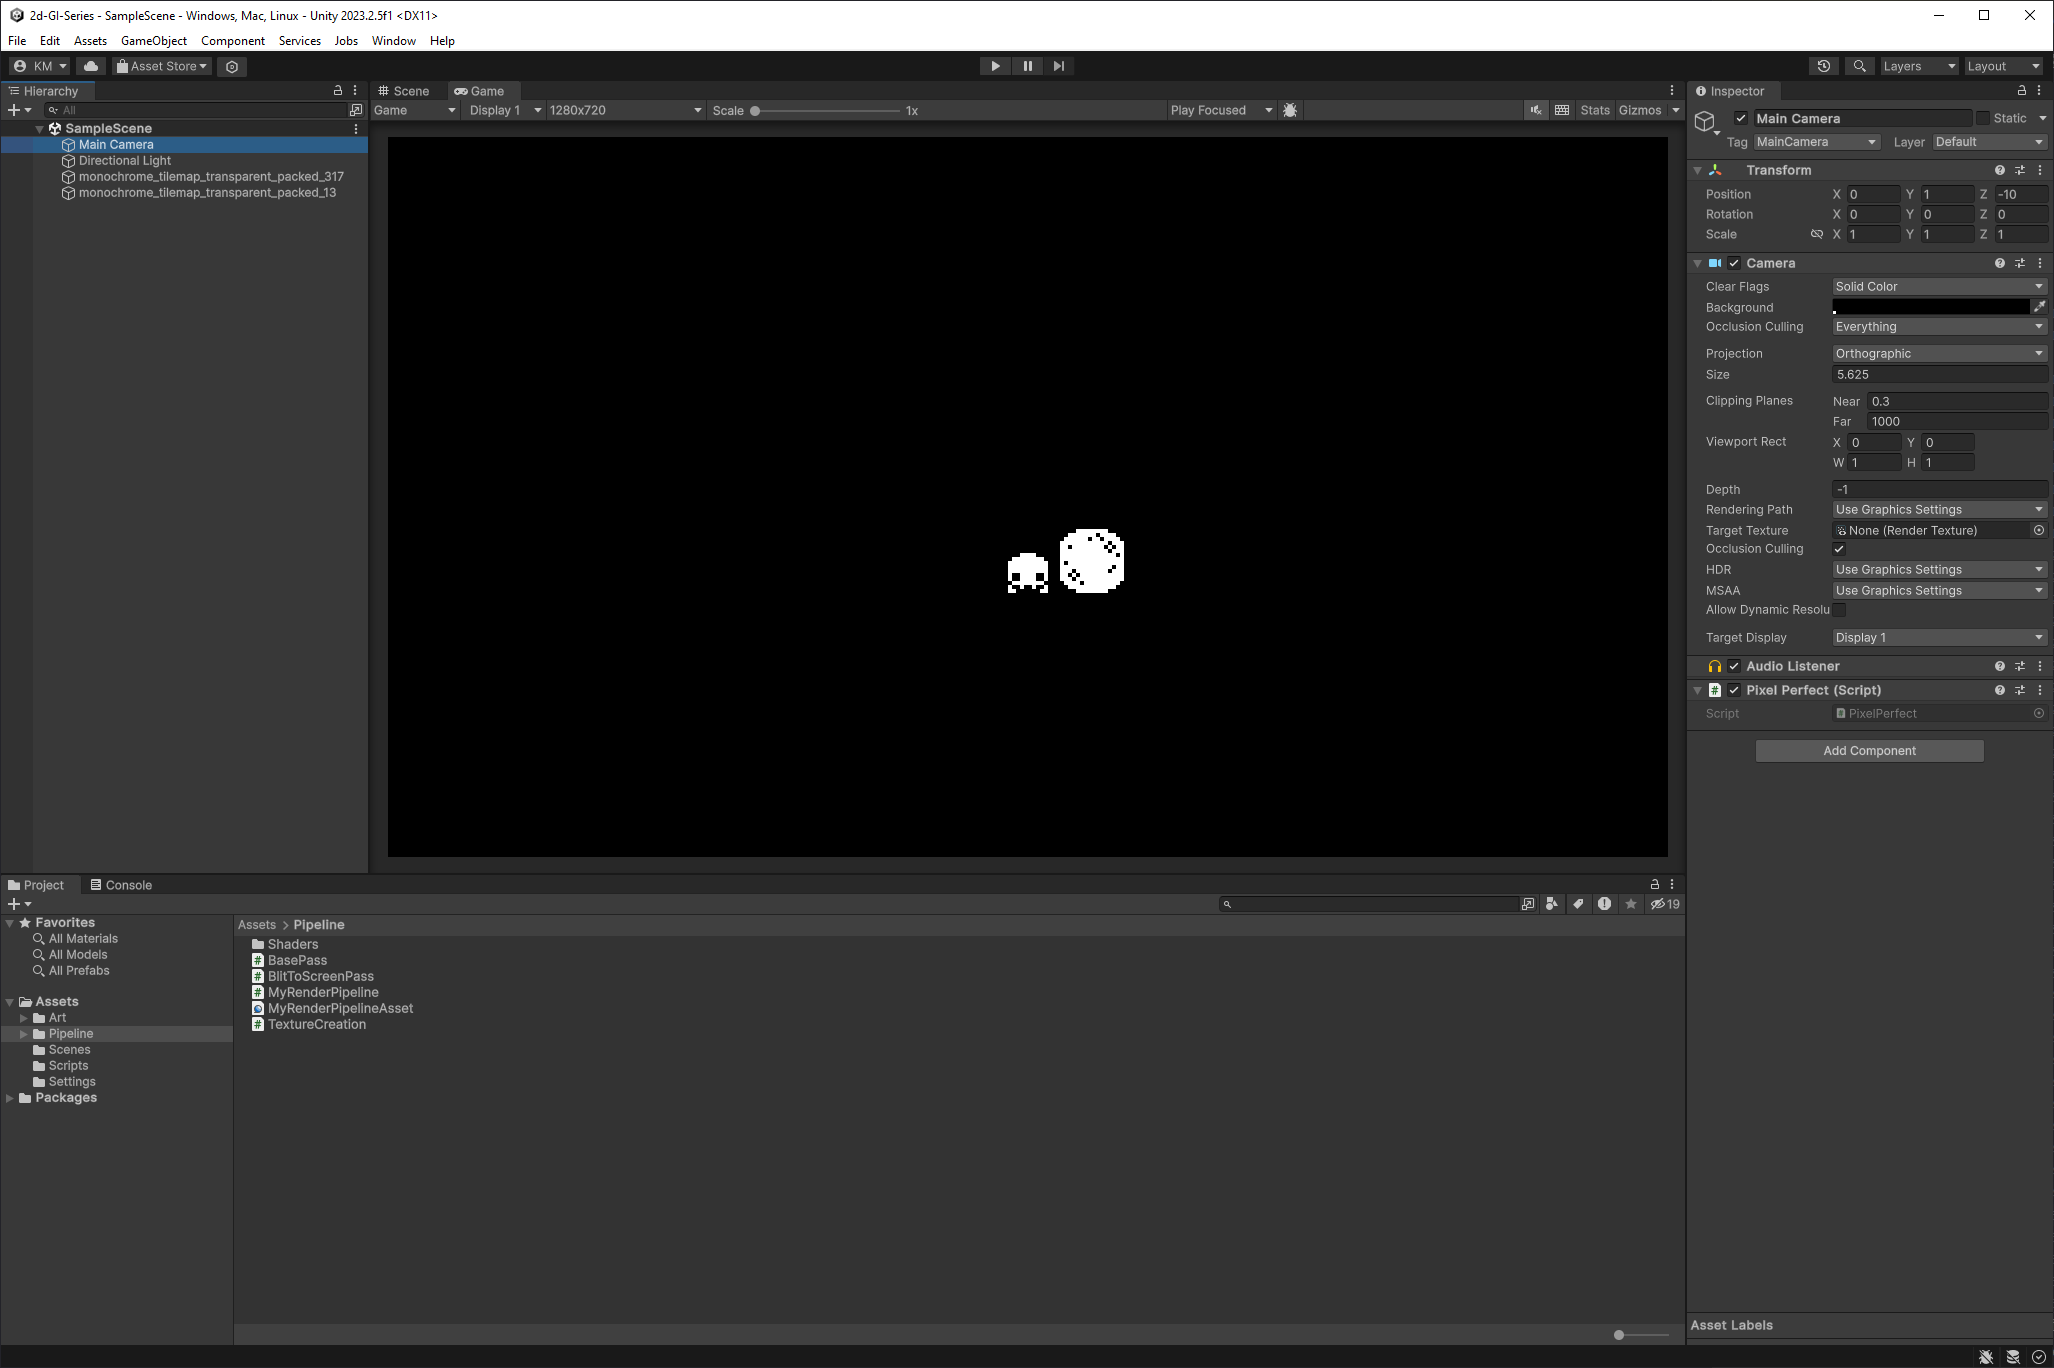
Time to see something on screen! Add some sprites on your scene and assign a material that uses our previously created sprite shader! Here i am using sprites from no other than Kenney. If you have setup everything correctly you should be able to see them 😎
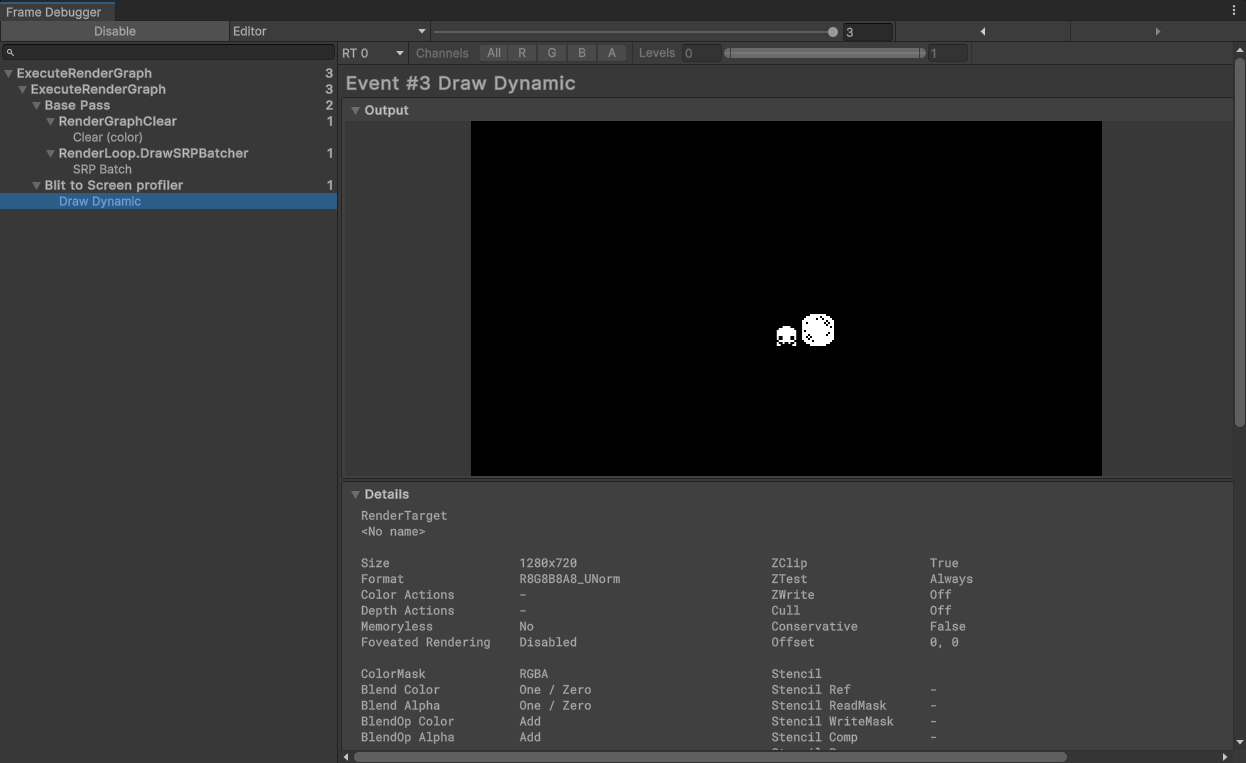
Opening the Frame Debugger (Window/Analysis/Frame Debugger) will show us in detail our draw calls, and passes. In addition since we are using the frame graph system we have access to Frame Graph Viewer (Window/Analysis/Frame Graph Viewer) which will help us a lot to keep track of everything as the number of passes and resources increases!
Final thoughts
Admittedly not a very exciting first part, but you are ready if you want to release a full 2d game just with this two pass renderer! We are also ready to move to more exciting things on the next part where we will generate a voronoi diagram with the jump flood algorithm and then transform it to a distance field representation! Before you know it we will reach the point where we have this
